
 Baulko Bulletin
Bright World, Dark Room
~ it's a darkroom in there ~
The darkroom. The true mystery of this fine establishment. Everybody knows where it is — it quite literally says “DARKROOM” in big bold letters. But, what is it for? Where did it come from? What purpose does it serve? And who does it serve? Nobody but I, and everybody who uses it, can answer these questions, my friend. The good news is, I am literally about to do that.
Edited (heavily) by Jonathan.
1: There are some things you should know about the darkroom.
Most importantly, these three:
1. It’s pitch black in there.
“I understood that part, but why?”
The answer to this is obviously, to scare your friends! But first, some clarification is in order. The only true ‘dark’ part of the room is the beginning chamber — a ‘decontamination’ chamber for light. Outside of this ‘chamber’ is the actual room, with both red and normal lights. The red lights are pretty spooky.
2. It’s used for photo development.
“But ██████, I can just take a photo on my phone!”
While that’s true, not all cameras work this way. Long before phones had a name, the first film camera took a photo. The process of taking the negative, and putting it onto paper, is the whole reason you require a dark room. But more on that later. By now, you’ve probably come up with a smarter question to ask: “Who still uses film cameras?” — well, the photography class does, so… I suggest you apologise to them. Yes, we do have a photography class which is run by the wonderful Ms Lockley. You can take it in Year 9 and 10 as an elective, and from what I’ve heard, it’s pretty fun.
3. You can’t go in there.
Well, you can, but not randomly, or without permission. The only people on the VIP list are the photography students, Ms Lockley, and well, their friends. Oh, and even if you somehow manage to get in there, no messing around, or you go back to 505.
2: What is film development?
I understand that some of you may not understand how film development works. So, I’ll explain to you the whole process of film development. There is a lot of science behind this, so if you’re looking to do well in your chemistry test, maybe you should look into it.
1. The creation of the negative.
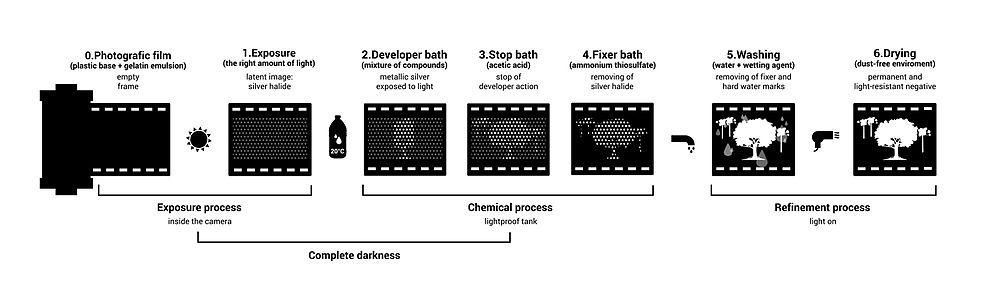
The negative of an image is the exact inversion of that image. For images of colour, it’s an image where the colours are inverted. For black and white images, however — which is what you get from film cameras — it’s an image where the dark parts are light, and the light parts are dark. The steps to create a photo negative are as follows:
a) Exposure.
In a film camera, light sensitive film is exposed to light for a few milliseconds. The areas exposed to light darken, which leaves a latent image on the film. This latent image cannot be seen by the naked eye, and must be developed. This is the negative, as the areas exposed to light are now darker.
b) Chemical bathing.
- The negative is bathed in developer fluid, which makes the image on the film visible. Film is agitated for 10 seconds then left for a minute. Repeat this for 9 minutes.
- The negative is then bathed in stopper fluid, which stops the development of the image, and decreases the amount of developer getting into the fixer. This process is kind of unnecessary, since you could just use water to wash off the remaining developer fluid. Film is agitated for 10 seconds then left for a minute, and this process is repeated for 5 minutes.
- The negative is finally bathed in a fixer, which takes away the remainder of the light sensitive silver halide. This means that the negative is no longer photosensitive, and can be shown the light of day. Film is agitated for 10 seconds then left for a minute, and this process is repeated for 5 minutes.
The whole process must be done in the absence of white light. If the negative is exposed to any white light, it turns black. The film is also rinsed between every bath, and is washed in a wetting agent before being dried. The film is now ready to be enlarged onto paper.
2. The creation of the photo.
This process is mostly the same as the creation of the negative, except for enlargement.
a) Enlargement. (Lo and behold!)
The enlarger is like a projector, where the negative is the lens. The negative is placed in front of the light from the enlarger, and the zoom is adjusted to the size of the light sensitive paper. The light then flashes the paper for a set amount of time, which leaves a latent image on the paper. This image is not a negative, because the negative acting as a lens means the darker parts of the negative are lighter on the paper, and vice versa.
b) Chemical bathing.
This process is exactly the same as what you do to develop a negative. After bathing it in the developer, fixer, and stopper, and then rinsing it, you get an image. Yay!! There are no set durations for photos, and you usually just use visual inspection.
Just to clarify the use of the darkroom, the whole process of enlargement and chemical bathing must be done in similar conditions, or else your image will be black. The negative’s latent image can be taken anywhere, as the camera protects the film from light. Things like shutter speed and light exposure do affect the final product too, but I’m no expert.
3: What does the darkroom look like from outside?
Let me get the map out…
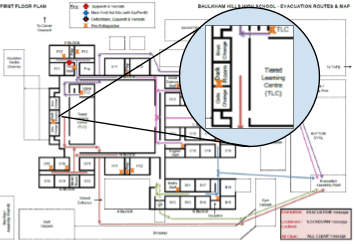
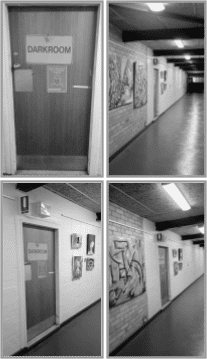
There you go.
4: Now for a student interview.
Obviously there’s some questions I can’t answer, like practical use and the facility’s details in Baulko specifically. So, I decided to recruit Abigail, a photography course student, to answer some of my (and hopefully your) questions. Warning — there’s a lot of big text blocks.
1. Is the room dark?
Only when the lights are off. If you turn on the lights, it’s just like a normal room. You might need the normal lights for things like checking if your photos turned out fine, or getting things that you need for developing photos. There’s a light switch next to the door that turns on the actual lights, and another one in the middle of the room that turns off the normal lights and turns on the red lights.
What are the red lights for?
So before we had digital cameras, people took photos by using light sensitive strips of film. Depending on how much light was let into the camera when the shutter goes off, it would develop differently. So, when you’re developing the photos, you can’t let any other light into the film otherwise it’ll screw up your photo. Red light isn’t bright enough to show up on photo paper, so you still have light so that you can see what you’re doing, without ruining your photo.
2. How big is the darkroom?
Half the size of a normal classroom.
Is it easy to walk around in?
When you’re alone, it’s really easy to get around, because there is more than enough space to walk and do stuff. When you’re sharing the space with more than 10 other people (like during class time), though, it’s a bit harder to get around, because with so many people, there’s probably going to be someone in your way.
3. Could you get lost in it?
HAHAHA ONCE I TURNED THE LIGHTS COMPLETELY OFF AND GOT LOST and somehow my friend could still see in the FREAKING DARKNESS.
██████ and Editor left this unedited.
4. How often is the room used in class?
It depends on what topic we’re doing in class… Last year (2024), we did one semester of digital photography (in which case we didn’t use the darkroom at all), but when we’re doing film photography, we usually use it around every fortnight. Usually Ms Lockley lets you use the darkroom whenever you need to, if there’s an assessment coming up. Towards the end of the year, we were using it every week because we needed to work on our assignments.
Could you use the darkroom during lunch and after school?
You can use it whenever she’s free during lunchtimes, before school and sometimes recess if you’re desperate enough.
Did you ever start a period in the darkroom?
Nope, we always meet in the classroom and then walk over to the darkroom.
5. On average, how long does it take to get a photo on paper?
Around 2 hours for the whole process (not including time that you spend taking photos), so the WHOLE whole process takes maybe 3-4 hours.
Why would taking a photo consistently take 1-2 hours?
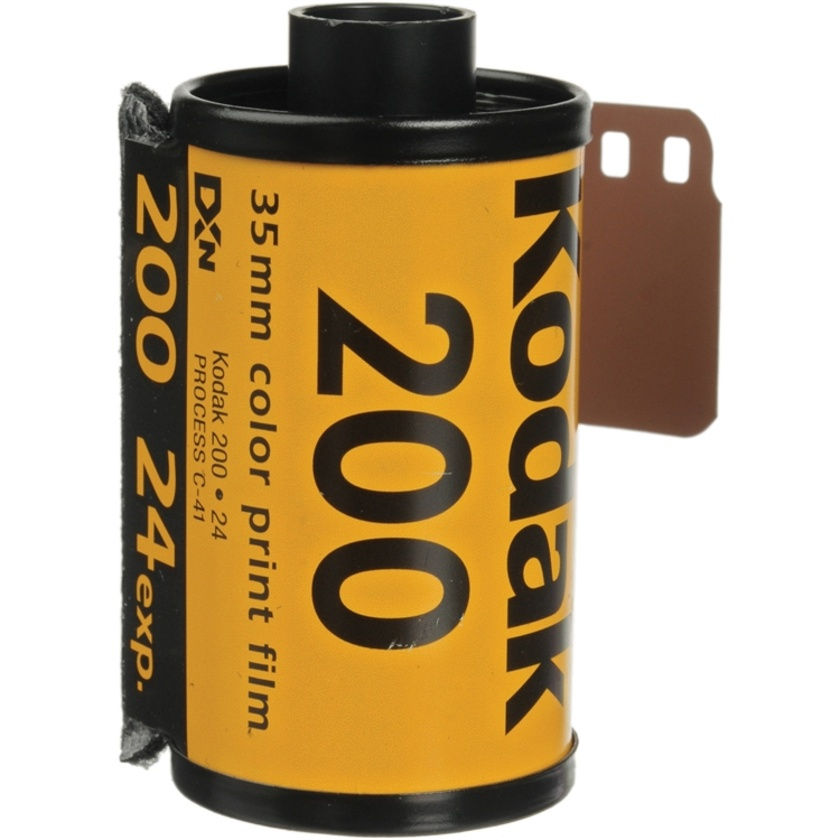
When you develop film, you have to take the entire roll of film out, and you can’t put it back in, so you have to use the entire roll of film (each roll of film has either 24 or 36 photos) before developing. So you end up taking 24 photos — which, if you’re actually doing properly, will take you around 1-2 hours to fill up.
So what would you say takes the longest in the whole process?
Hmm I think photo taking, but the most annoying part is developing because there’s a lot of waiting time, so it feels longer.
How long does development take?
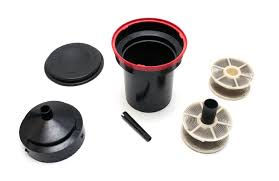
First you have to load your film from the canister into the development tank. You’re taking the film out of the roll and basically preparing it for the chemicals for developing by putting it into this black jar. It took me 40 minutes the first time, but now I can probably do one in around 7 minutes or less.
Then you have to develop. Loading the film into the developing tank makes the whole thing very easy, because to do the chemical reaction, you just have to pour the chemicals into the jar using a funnel. Development has a lot of waiting time, and there are 3 stages in total. Just developing the film probably takes me around an hour, because you have to prepare the chemicals (they need to be diluted with water at different ratios), and then actually develop the photos. After the 3 stages, you rinse out your canister for about 3 minutes, and then THE BEST PART… YOU GET TO REVEAL YOUR GLORIOUS CREATION TO THE LIGHT OF DAY AGAIN!!!!!!!!!!!!!!!!!!!!!!!! If you failed, then you can cry, because you just wasted a roll of film and 2 or 3 hours.
If you do everything right, the success rate is pretty high. Personally I’ve failed 5 times before because the film roll got exposed to light T-T. Failing basically means that when you take your film out, it’s completely pitch black.
Anyway, after you develop the film, you enlarge it onto film paper and develop it again. Before that, you have to do test strips, which is basically where you get smaller pieces of paper and expose them to light for different amounts of time, and pick the best one. The longer you have the light on the paper, the darker it will be because it has more time to absorb the light. For my test strips, I usually expose 1/4 of the paper to 5 sec, 10 sec, 15 sec and 20 sec and then after I’ve picked which one — this is basically the exposure setting on your phone — I stick with that one and do a test strip for filter paper, which basically increases the contrast. I do 3 different contrast tests, and then pick the best one. After that you enlarge the photo onto an A5 paper and develop it to see if it’s all nice and good, and then you do the same on an A4 paper.
How much do you dilute the chemicals?
Water : Chemical — developer fluid is 240:60 mL, stopper fluid is 15:285 mL, and fixer fluid is 240:60 mL.
Are these strict measurements? Can you be slightly off?
Yes, you can be slightly off and it doesn’t make too much of a difference — I knew some people who were doing 240:60 for all the measurements and theirs developed fine. Obviously you should try and use the right measurements, but if they’re not right, it doesn’t matter too much.
What do you look for when using visual inspection?
When you think the photo is dark enough, you take it out of the developer and into the stop bath, which doesn’t do much. Then you finally put it in the fixer, which just increases some small details. If you put it in the developer for too long, you can’t fix it later in the process. Once I accidentally left my photo in fixer for more than 2 periods and it was fine.
What might cause your film to be pitch black?
Last year (2024), we had an issue with the red lights where they weren’t properly censored. Film can’t be exposed to light. That means that when you load the film canister, you have to either do it in a light proof bag or you can do it in the red light (as I said before, red light doesn’t show up on film), so me and my friend loaded 2 rolls of film using the red light (because it’s quite difficult to see what you’re doing) and umm… they were both pitch black.
6. Are the chemicals safe? Could I drink them (and stay alive)?
I’m pretty sure they are toxic. Just by smelling them you can tell. MAKE SURE YOU WEAR GLOVES WHEN YOU DEVELOP, because my hands stank like hell for the next 3 days and the smell doesn’t go away even if you wash your hands many times. I’d say it smells like rotten food mixed with cardboard mixed with rusty iron…
7. Do you use tap water or FIJI water to wash film? Is there a sink?
Tap water. Usually, I just leave it under the tap to rinse for about 3 minutes, and during this time you can tidy up the mess you made while developing.
8. Have you ever been scared?
Hmmmmmm I was a bit scared at the start, because I thought it was going to be very dark, but now I’m more scared that my photos aren’t going to turn out properly :DDDDDD
Well, that interview was certainly long. But it was very informative as well. I myself enjoyed taking the interview. Good job to those who read the whole thing to the very end.
Editor: The columns were not on our side.
5: Some details about photography as an elective.
Now you’re probably wanting to know more about the photography elective. The following information is specific to a cohort/year group, so remember that it can be different for yours.
1. What do you guys actually learn and do in class?
We started the year by learning about the 3 main factors that influence a photo on a digital camera, called the exposure triangle. I came into photography literally ONLY shooting on auto, and then, in about a month and a half, I was shooting on manual. We also learnt how to use foreground, middle ground, and background to frame the photo. We also did case studies about photographers. This year we did Trent Parke and Ansel Adams. We ended the year with using the darkroom, and the enlargers.
2. How many students are there in total?
There’s 16 people in our class but it will probably be different for you guys, because our course is 100 hours and yours will be 200 hours. (Note this is about 2024-2025)
What’s the max class size?
I have no idea :) I just know that we haven’t hit the max number yet.
3. How many periods do you have in a week?
Well every 100 hours is 2 periods. So we currently have 2 periods in a week, while you guys will have 4.
4. Would you recommend this course to anyone?
100 PERCENT. I think photography is a great way to appreciate the world around you, and as cliché as it sounds, it’s a great way to remember how far you’ve come. Having the skill of photography is very beneficial.
5. Is THE Ms Lockley sigma?
MS LOCKLEY IS THE MOST SIGMA AND MS CLANCY IS ALSO SIGMA.
6: Bye bye!
If, even after all of this beautifully written information, you still have some questions about the darkroom, I’m not sure what to tell you. But in all seriousness, if you really need to know more about the darkroom, go join the photography class. Hopefully you’ll retain some of this for the future, and I’ll have fulfilled my goal. ██████ out.
Editor: Editing is painful, would not recommend — and I’m saying this even with ██████’s help. And hey, photography is pretty cool. I did learn a lot.
end.